
RIBS · PREP GUIDE
How to Trim Spare Ribs to St. Louis Style
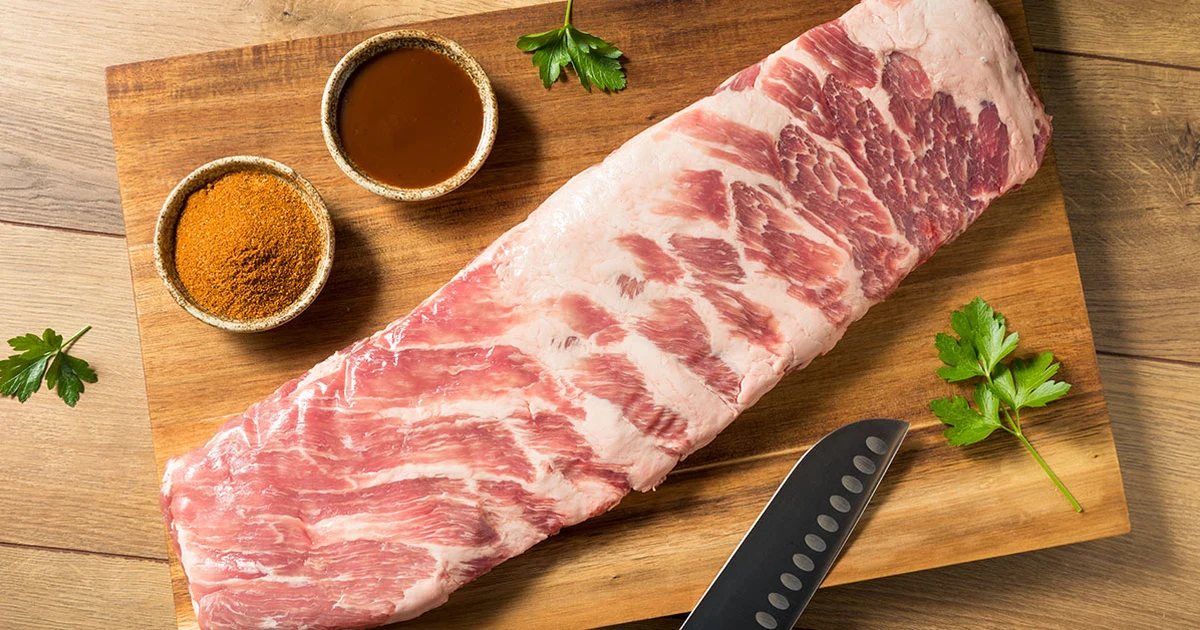
A full spare rack includes a cartilage-heavy tip strip and may have a loose skirt flap on the bone side. A St. Louis trim removes those extras for a rectangular rack. You can also cook the full rack without squaring it.
What St. Louis style means
St. Louis style is a way of squaring a full spare rack. You start with a whole spare and remove the parts that stick out, leaving a rectangular slab of ribs. The cut is defined by its shape and by the removal of the breastbone and excess cartilage. There is no required number of bones, and the rack stays a spare when you finish.
The trim below follows the anatomy and folding method in Chris Sussman’s spare-rib guide at The BBQ Buddha. Start with a cold rack on a stable cutting board and keep a tray beside it for the edible trim.
Identify the parts
Turn the rack bone side up. The skirt is a loose strip of meat lying across the back of the rack, over the membrane. The rib tips form a broader cartilage-heavy strip along a long edge, beyond the ends of the rigid rib bones. The breastbone may still be attached in that tip section, depending on the butcher’s trim.
Remove the skirt and flap
Lift the loose skirt flap and slice beneath it where it attaches, keeping the blade nearly parallel to the rack’s surface. Trim it flush without digging between the ribs. Keep your supporting hand clear of the cutting path and save the edible strip on a separate tray.
The loose skirt and the thicker rack can cook differently. Removing the flap leaves a flatter surface for seasoning and lets you check that smaller piece separately.
Find the natural junction
Gently bend the rack lengthwise like closing a book. Feel for the ends of the rigid rib bones and the more flexible junction leading into the tips. Use that junction to locate your cut rather than drawing a rectangle through hard rib bones.
Cut off the tips
Lay the rack flat again. Cut through the softer junction beyond the rib ends to separate the tip strip, including any attached breastbone, from the main rack. Use controlled strokes with your free hand away from the blade. The tips contain cartilage; keep them as a separate piece.
Remove the membrane
With the shape squared, the bone side may still carry its membrane. Loosening it with a blunt knife over a bone and peeling it with a dry paper towel takes a few minutes and is covered step by step in how to remove the membrane from ribs. You can do it before or after trimming.
What to do with the trimmings
The skirt and tips are good eating. Keep them cold and separate from the main rack and from anything you will eat without cooking. They need their own cook and their own timing check, so treat them as a small second batch.
The thin skirt and cartilage-heavy tips differ from each other as well as from the main rack. Check each piece separately rather than assuming everything finishes together.
Weigh the trimmed rack for rub
Once the rack is trimmed, weigh it. Rub amounts scale with the weight of the meat you are actually cooking, and the rub calculator turns that weight into a quantity. The trimmings are a separate batch, so weigh them on their own if you plan to season them.
Spares cannot become baby backs
You cannot cut full spares into baby backs, because they come from different places on the animal. Spares are the lower section of the rib cage; baby backs are the smaller, curved rack higher up near the loin. Trimming a spare changes its outline, and it stays a spare. The baby back and spare comparison covers which cut to buy. This guide assumes you already have full spares in hand.
When to stop
Trim loose ragged ends sparingly to square the short sides. Stop when the main rack is roughly rectangular. Preserve attached meat instead of cutting away sound ribs for perfect symmetry. An already-trimmed St. Louis rack needs inspection for loose flaps and membrane, without another tip-removal cut.
If a knife meets hard bone, reposition along the seam or ask the butcher for help. Forcing a blade through bone damages the rack and the knife.
Keep raw prep out of the danger zone
Trim a cold rack and keep it cold between steps. Raw pork belongs at 40°F or below in the refrigerator, and the FDA cold-storage guidance covers that limit along with the cleanup routine that goes with it. Raw perishables should not stay out of refrigeration beyond two hours, or one hour when the room is above 90°F.
Set out one cold rack at a time and return paused pieces to the refrigerator, covered. Add up time outside refrigeration during raw trimming, seasoning and transport. Refrigeration does not reset accumulated exposure. Discard meat that exceeds the limit or whose time and temperature history is unknown; some toxins survive cooking.
Wash hands with soap and water for at least 20 seconds before and after handling the raw rack, and wash the board and knife in hot soapy water when you finish. Store the trimmings cold and separate from anything you will eat without cooking.
The rib timing guide covers the main rack once preparation is finished. The raw-preparation exposure limits above do not set the duration of a controlled, uninterrupted smoking cook.
Spare rib trimming questions
Do I have to trim spare ribs at all?
No. A full spare rack cooks fine as it is. Trimming squares the shape and removes the thin flap and the cartilage tips so the slab sits flatter. It is a choice about shape and evenness.
Can I turn spare ribs into baby backs?
No. They are different locations on the animal. Baby backs come from higher on the rib cage near the loin. Trimming changes a spare's outline, and it remains a spare.
Are the trimmings edible?
Yes. Save the edible skirt and rib tips, keeping them refrigerated until cooking. The skirt is thin and the tips contain cartilage, so check each separately from the main rack.
How much meat will I lose to trimming?
There is no fixed number, because it depends on the rack. Do not aim for a target percentage. Square the edges, remove the flap and tips, and stop.
Sources and safety guidance
The sources below cover food safety. Cooking times and tenderness targets are practical barbecue guidance; check the meat as it cooks.
- Refrigerator Thermometers - Cold Facts about Food SafetyU.S. Food and Drug AdministrationKeep refrigerated food at 40°F or below. Raw meat may not sit at room temperature beyond 2 hours, or 1 hour above 90°F ambient; keep raw foods separate and clean hands and surfaces.
Related guides
How to Remove the Membrane From Ribs
Remove rib membrane before seasoning: loosen the bone-side sheet with a blunt knife, grip it with a paper towel, and peel without cutting into meat.
Read the guideHow Long to Smoke Ribs (Baby Back, St. Louis, and Spare)
Baby back ribs smoke in about 4 to 5 hours, spare or St. Louis in 6 to 7, at 225 to 250°F. The timing by cut, the 3-2-1 method, and how to test for done.
Read the guideBaby Back vs Spare vs St. Louis Ribs: Which Rack to Buy
Baby backs are lean and cook in 4 to 5 hours; spares are meatier and need 6 to 7. St. Louis is a trimmed spare. How to pick the right rack for your cook.
Read the guide